SQM Setup
Jump to navigation
Jump to search
SQM Setup
You can connect an SQM (Sky Quality Monitor) sensor device to Voyager and display values such as sky brightness. The values will be displayed in the Observing Conditions widget, and can be transferred into a decimal number DragScript variable with the Update Decimal from Observing Conditions action.
Color Coding
Throughout the Setup workspace, Voyager uses color to indicate the following:
- Black: A normal setting
- Gold or Yellow: Use caution when changing as things may not work well or as expected
- Red: Use extreme care when changing this setting - the wrong value can damage your equipment or the imaging session may fail
SQM Setup Workspace
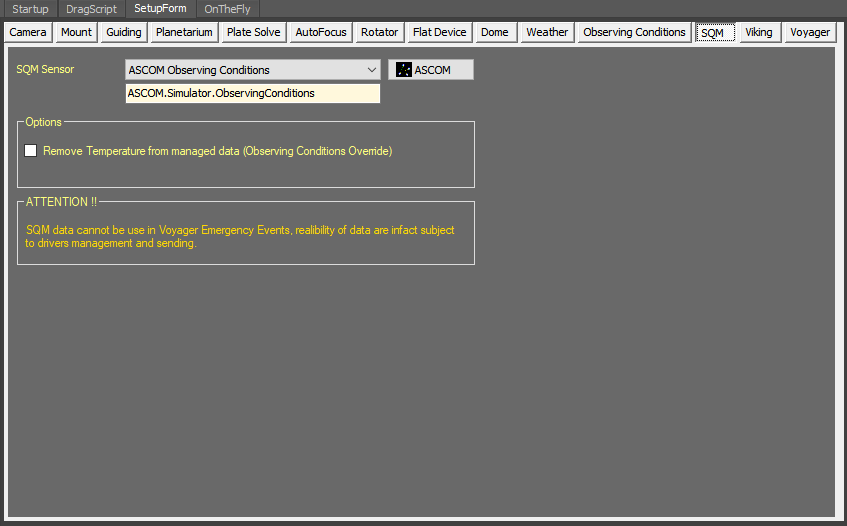
The Observing Conditions setup worksapce is where you select and configure an SQM sensor:
- SQM Sensor: Select your SQM sensor device from the drop-down list:
- Options:
- Remove Temperature from managed data (Observing Conditions Override): If checked, delete the temperature data returned from the SQM sensor - use the value from the Observing Conditions monitor instead
- Options:
Important Note! SQM data cannot be used to generate an Emergency Exit because it is not reliable due to driver management and communication with the SQM device
Other Setup Pages
▼ Setup

