Viking
Voyager's companion product, Viking, provides I/O status and control for domotics (control devices used for home automation) and your observatory's I/O devices.
Actual release version is 1.0.32
Viking can be used standalone from its GUI and also integrated with Voyager to check the status and set the values of:
- Relay Cards: read status and set on/off Digital (on/off)
- Analog Input status
- Digital Input status
- PWM (Pulse-Width-Modulation) device: read status and set value
- DAC (Digital to Analog Conversion) device: read status and set value
Viking contains an application server for both local and LAN-based programmatic control
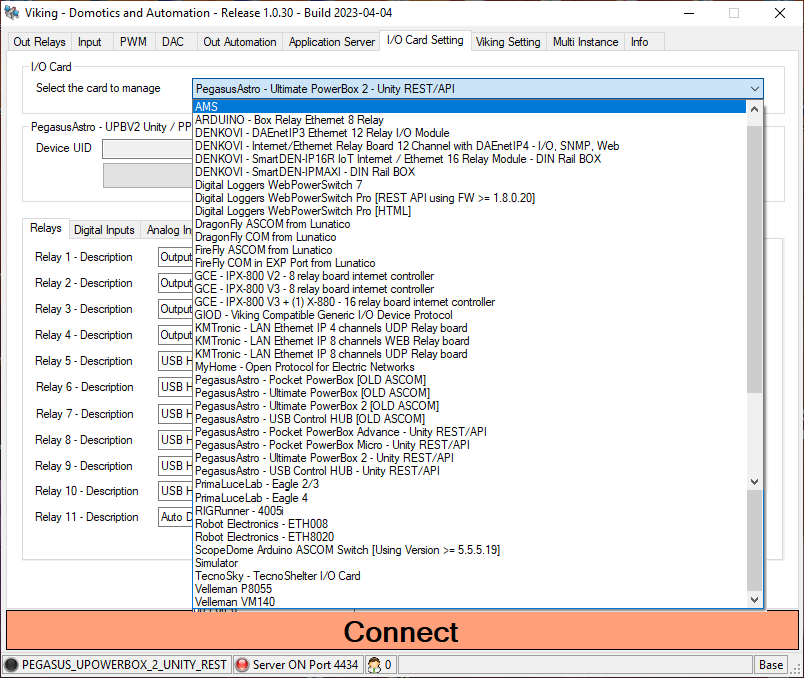
List of Supported I/O Cards and Automation Protocols
This is actually list of I/O cards and automation protocols (more are coming or may be requested at license purchase):
- AMS
- ARDUINO - Box Relay Ethernet 8 Relay
- DENKOVI - DAEnetIP3 Ethernet 12 Relay I/O Module
- DENKOVI - Internet/Ethernet Relay Board 12 Channel with DAEnetIP4 - I/O, SNMP, Web
- DENKOVI - SmartDEN-IP16R IoT Internet / Ethernet 16 Relay Module - DIN Rail BOX
- DENKOVI - SmartDEN-IPMAXI - DIN Rail BOX
- Digital Loggers - Web Power Switch Pro (Using REST API with firmware >= 1.8.0.20)
- Digital Loggers - Web Power Switch Pro (Using HTML API)
- Digital Loggers - Web Power Switch 7 (Using HTML API)
- DragonFly ASCOM from Lunatico
- DragonFly COM from Lunatico
- FireFly ASCOM from Lunatico
- FireFly COM in EXP Port from Lunatico
- GCE - IPX-800 V2 - 8 relay board internet controller
- GCE - IPX-800 V3 - 8 relay board internet controller
- GCE - IPX-800 V3 + (1) X-880 - 16 relay board internet controller
- GIOD - Viking Compatible Generic I/O Device Protocol
- KMTronic - LAN Ethernet IP 4 channels UDP Relay board
- KMTronic - LAN Ethernet IP 8 channels UDP Relay board
- KMTronic - LAN Ethernet IP 8 channels WEB Relay board
- MyHome - Open Protocol for Electric Networks (BTicino)
- PegasusAstro - Pocket PowerBox [OLD ASCOM]
- PegasusAstro - Ultimate PowerBox [OLD ASCOM]
- PegasusAstro - Umtilate PowerBox 2 [OLD ASCOM]
- PegasusAstro - USB Control HUB [OLD ASCOM]
- PegasusAstro - Pocket PowerBox Advance - Unity REST/API
- PegasusAstro - Pocket PowerBox Micro- Unity REST/API
- PegasusAstro - Ultimate PowerBox 2 - Unity REST/API
- PegasusAstro - USB Control HUB - Unity REST/API
- PrimaLuceLab - Eagle 2/3
- PrimaLuceLab - Eagle 4
- PrimaLuceLab - Eagle 5
- Robot Electronics - ETH8020
- Robot Electronics - ETH008
- ScopeDome Arduino ASCOM Switch [Using Driver >= 5.5.5.19]
- Simulator
- TecnoSky - TecnoShelter I/O Card
- Velleman P8055
- Velleman VM140
- West Mountain Radio - RIGRunner 4005i
Installation
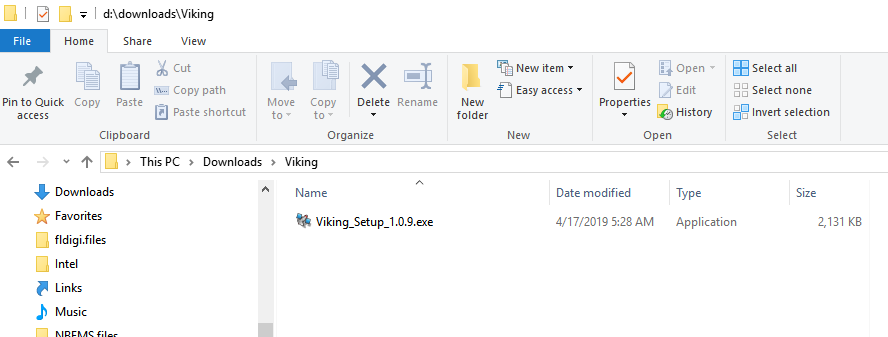
Download the free trial version of Viking, then locate the downloaded Viking_Setup_X.Y.Z.exe file and double-click to start installation:
If you get a Windows User Account Control warning message asking if you want to install this application from an unknown publisher, click Yes to continue.
Select the language for installation and click OK
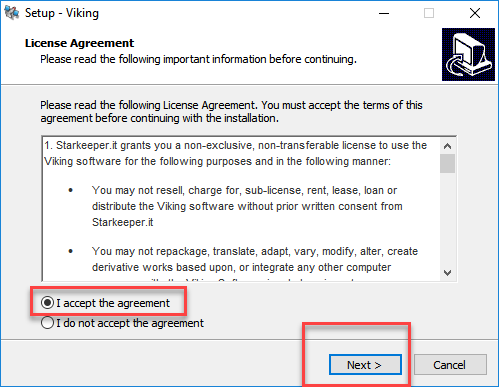
Click the radio button to Accept the agreement and click Next to continue
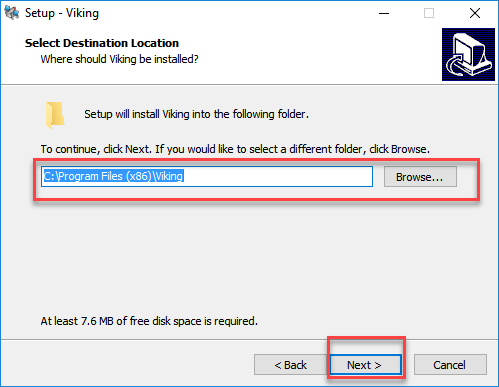
Choose your installation directory or just accept the default and click Next to continue
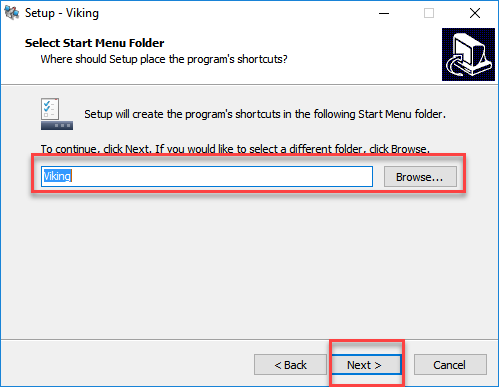
Select your Start Menu folder or accept the default and click Next to continue
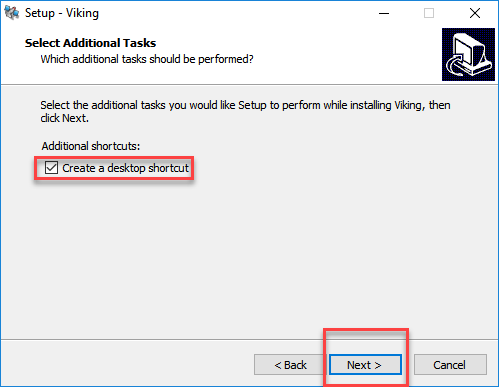
Check the box to create a desktop shortcut (recommended) and click Next to continue
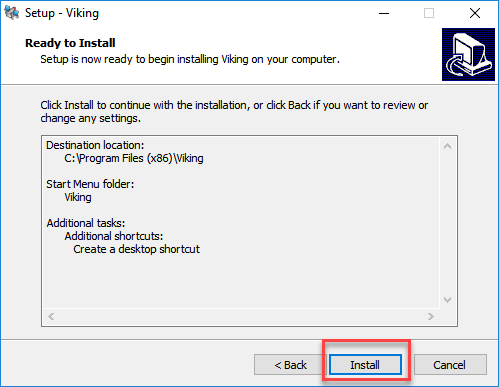
Confirm your settings and click Install to perform the installation, or Back to make changes
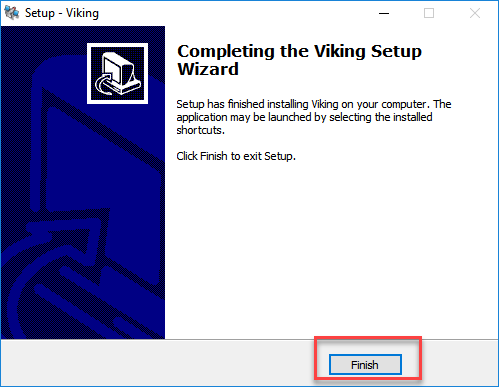
Click Finish to exit Setup
Licensing
Double click the desktop Viking icon, or type Viking in the Windows menu to find and start the application.
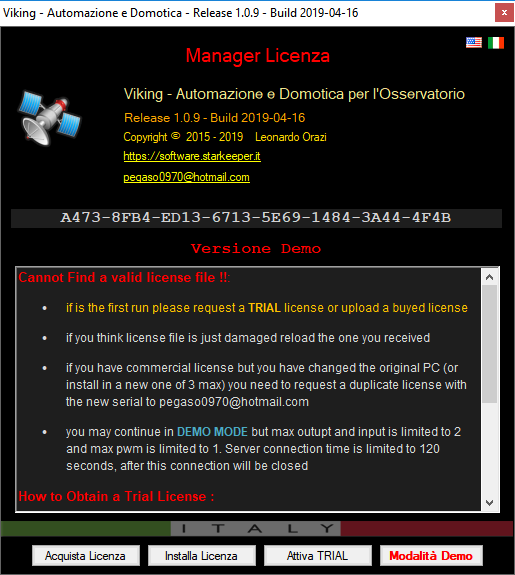
Viking will start in Demo mode and show the License Manager splash screen
In Demo Mode, the number of I/O devices is limited and the application server is not available.
You can use Demo Mode indefinitely to learn the Viking software and work with the included Simulator.
Trial License
When you are ready to start your 45 day free trial, click the Attiva TRIAL button (Activate Trial). If you are connected to the Internet, your trial license will be automatically activated.
If you are not connected to the Internet, follow the instructions under "How to Obtain a Trial License" in the splash screen. You will have to copy and paste the serial number - in the example above it is the set of eight four-digit blocks of letters and numbers - into an email and send it to the email address shown in the message. You will receive a license file within 24-48 hours by email.
Commercial License
Click the Acquista Licenza button (Buy License) to obtain a commercial license. You will have to copy and paste the serial number - in the example above it is the set of eight four-digit blocks of letters and numbers - into the order form when you buy the license. You will receive a license file within 24-48 hours by email.
Installing Your License
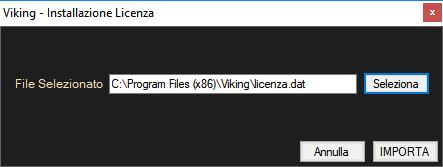
Click the Installa Licenza (Install License) button to install your license file.
Click the Seleziona (Select) button to browse to the license file attached to the email you received.
Click IMPORTA (Import) to import the license file and activate it. Click Annulla (Cancel) to cancel the operation and exit the window.
You can now start Viking and use it with your newly installed license.
Setup
You can setup your I/O controller card on the I/O Card Setting tab of the Viking GUI.
One instance of Viking can control one I/O card.
- I/O Card: Choose your I/O card from the drop-down list of supported devices.
Depending on the I/O card you select, different fields will be displayed directly below the I/O card selection drop-down.
These fields tell Viking how to address the I/O card. Fill them out as appropriate for your card.
In this example, the KMTronic UDP Relay card is selected, and it requires an IP Address and UDP/IP Port number.
Most cards use an IP address and port number, but some have ASCOM drivers or other means of connecting.
Depending on the capabilities of the card you select, one or more of the tabs in the lower half of the screen will have relevant settings for the selected card.
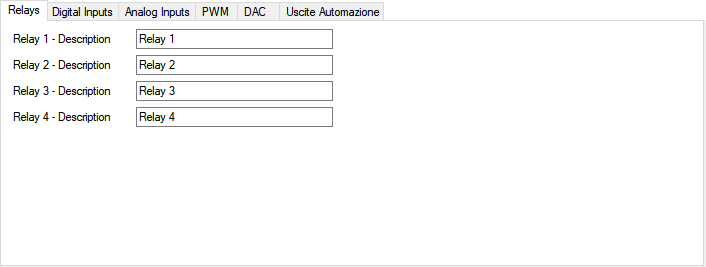
Relays Setup Tab
The number of relays shown on this tab should match the number on the I/O card selected from the drop-down on this tab.
- Relay X - Description: Provide a meaningful name for the relay. The name you provide here will appear on Viking's Relay control tab
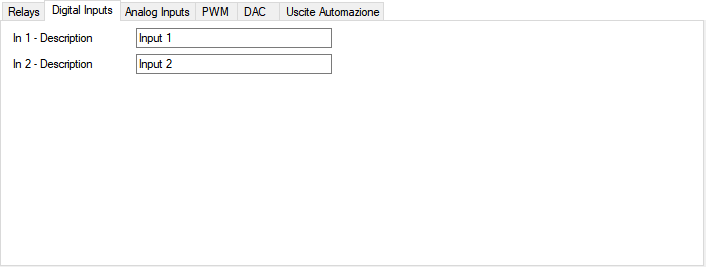
Digital Inputs Setup Tab
- In X - Description: Provide a meaningful name for the digital input. The name you provide here will appear on Viking's Input control tab
Analog Inputs Setup Tab
- In X - Description: Provide a meaningful name for the analog input. The name you provide here will appear on Viking's Input control tab
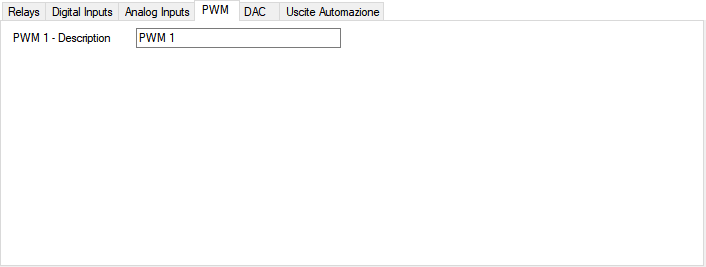
PWM Setup Tab
- PWM X - Description: Provide a meaningful name for the PWM device. The name you provide here will appear on Viking's PWM control tab
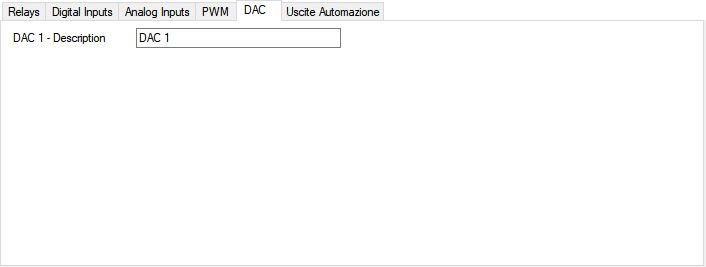
DAC Setup Tab
- DAC X - Description: Provide a meaningful name for the DAC device. The name you provide here will appear on Viking's DAC control tab
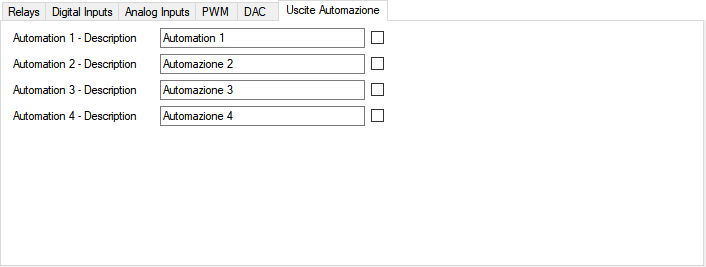
Uscite Automazione Setup Tab
Note: "Automations" are unique to the MyHome automation device. You can use Voyager's DragScript to automate reading and setting any I/O device controlled by Viking.
- Automation X - Description: Provide a meaningful name for the Automation device. The name you provide here will appear on Viking's Out Automation control tab
Additional Info for some I/O Cards:
Below is specific information for some I/O Cards regarding their use:
- Digital Logger:
- In order to use this cards its necessary to use firmware version 1.8.0.20 or newest, activate the flag for REST API for admin and not admin user, choose also legacy clear login allow flag (or Allow legacy plaintext login methods) using web setup. Viking use REST API to communicate with this Card.
- DragonFly e FireFly from Lunatico (COM and ASCOM):
- Use Viking (Or Voyager if you manage Vikign from Voyager) to connect first time the hardware, in this way the user environment is the one correct to be used with Viking. Other you will not be able to connect the board
- If you have used another program (not VIking and Voyager) you must kill the DragonFly /FireFly application or better restart the PC to use with Voyager
- PrimaLuceLab Eagle 2/3/4/5 using Manager X version:
- Manager X lock the hostname/IP address to use, please use always localhost or the connection will be not accept. This is a limitation of the Manager X developers. Please , if you need to connect Viking from another PC open a ticket to the PrimaLuceLab Support.
Descriptions and Connection Test
After naming your I/O card's individual controls, you can save the descriptions to a file, reset the descriptions to the default, and test your connection.
The buttons below the descriptions provide these functions:
- Reset Objects Description: Sets the descriptions back to the default values, e.g. Relay 1, Relay 2, etc. Be sure this is what you want so you don't accidentally lose all your meaningful names
- Save Objects Description: Saves the descriptions (meaningful names)
- Connection Test: After selecting your I/O card and configuring its address, click Connection Test to make sure Viking can communicate with your I/O card
Connecting and Status
At the bottom of the Viking GUI you will always find the Connect button and some additional status information.
- Connect: Click to connect to your I/O card. After successfully connecting, the button reads Disconnect. Click to disconnect from your I/O card
Connection status information appears at the bottom of the Viking window:
- The type of I/O control card selected. The LED is black if not connected, green if connected
- Viking's Application Server port number. In this example, the application server is on port 4434
- Number of clients connected to Viking's application server
- License type
Relay Devices
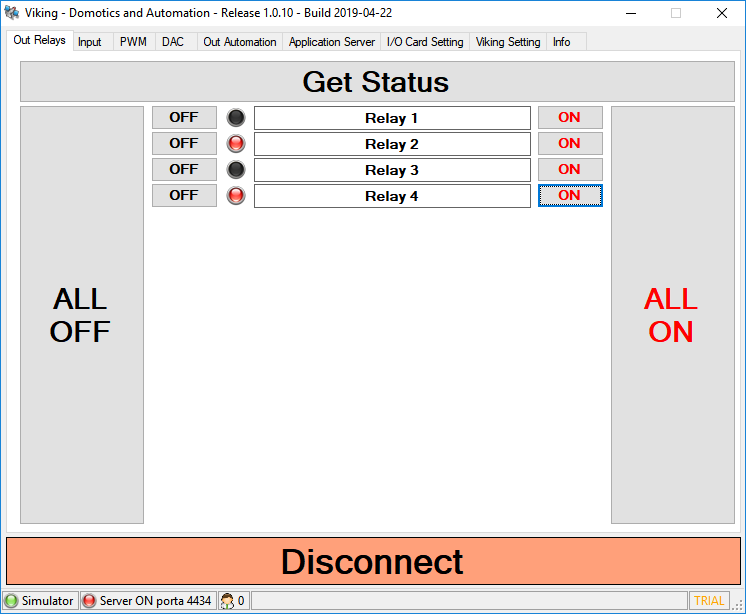
The Out Relays panel shows the current status of connected Relay devices and provides buttons to set individual or all relays on or off.
- Get Status: Click to refresh relay status
- ALL OFF: Click and then click OK on the confirmation popup window to set all relays to the OFF position
- ALL ON: Click and then click OK on the confirmation popup window to set all relays to the ON position
- OFF: Click the OFF button to the left of the relay description to turn an individual relay OFF
- ON: Click the ON button to the left of the relay description to turn an individual relay ON
- LED's: The LED's to the left of the descriptions are black if the device is OFF, and red if it is ON
Input Devices
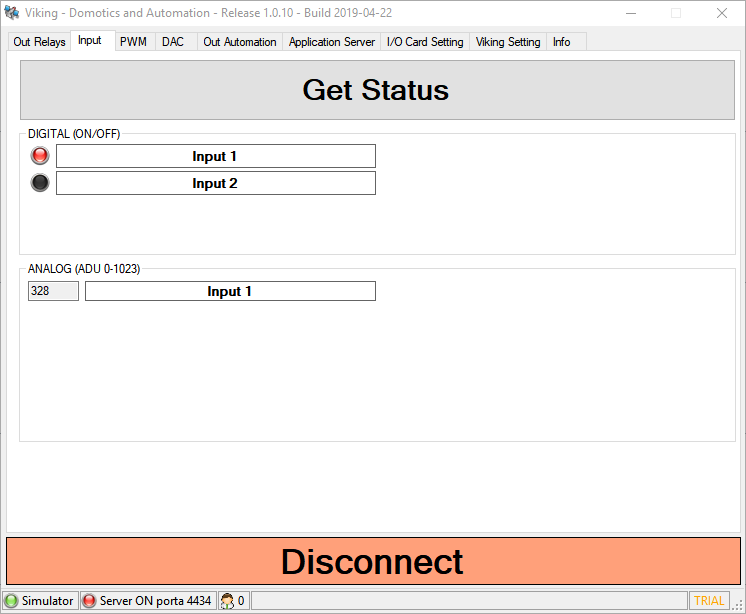
The Input panel shows the current status of connected digital and analog input devices
- Get Status: Click to refresh device status
- LED's: The LED's to the left of the descriptions are black if the device is OFF, and red if it is ON
- Analog: The value of the Analog input is displayed in the box to the left of the description
Pulse Width Modulation (PWM) Devices
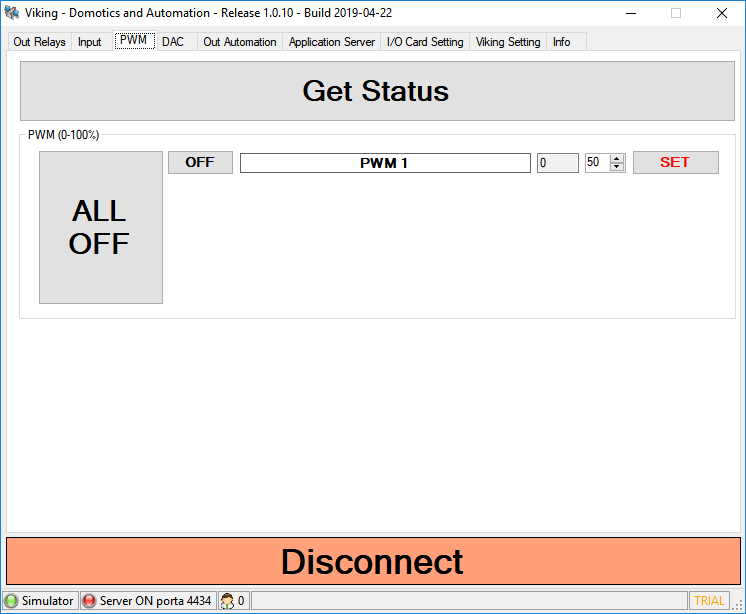
The PWM panel shows the current status of connected PWM devices and provides buttons to set individual or all PWM devices to a specified value or off.
- Get Status: Click to refresh PWM device status
- ALL OFF: Click and then click OK on the confirmation popup window to set all PWM devices OFF
- OFF: Click the OFF button to the left of the relay description to turn an individual PWM device OFF
- SET: Sets the PWM device to the value specified by the counter field
- Value: The field to the right of the PWM description label shows the current value of the PWM device
Digital to Analog Conversion (DAC) Devices
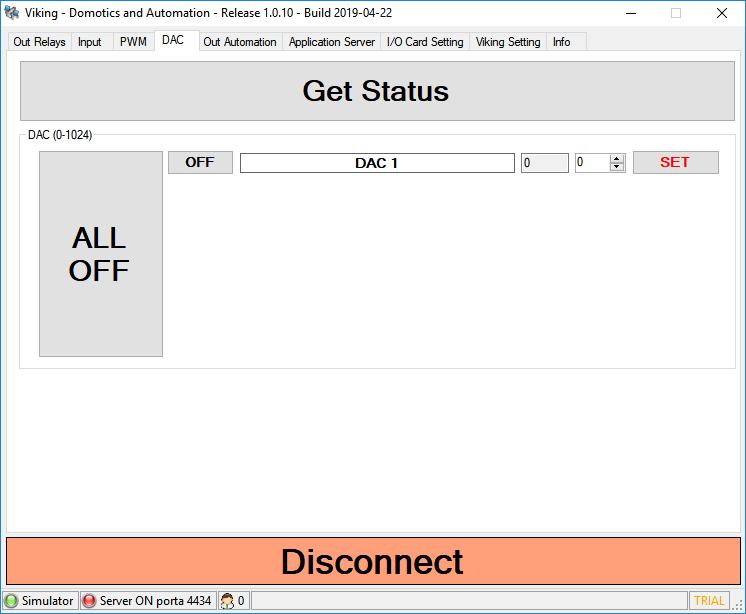
The DAC panel shows the current status of connected DAC devices and provides buttons to set individual or all DAC devices to a specified value or off.
- Get Status: Click to refresh DAC device status
- ALL OFF: Click and then click OK on the confirmation popup window to set all DAC devices OFF
- OFF: Click the OFF button to the left of the relay description to turn an individual DAC device OFF
- SET: Sets the DAC device to the value specified by the counter field
- Value: The field to the right of the DAC description label shows the current value of the DAC device
Home Automation Devices
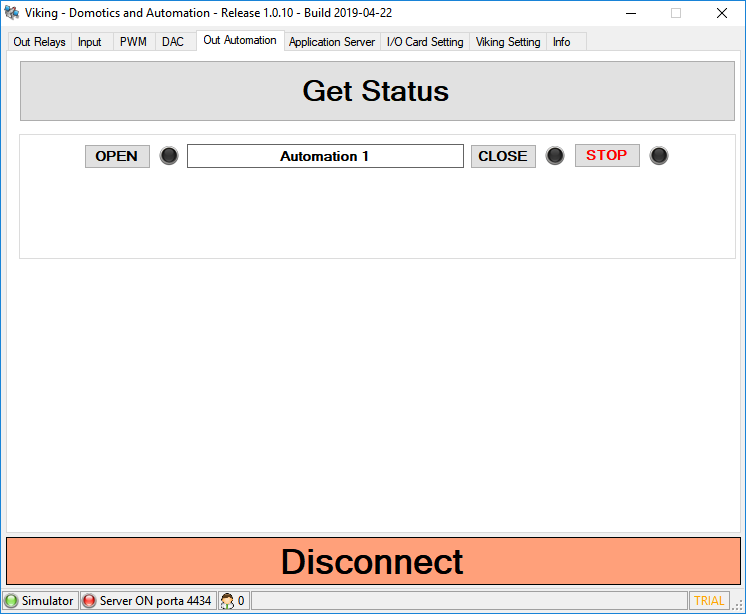
The Out Automation panel shows the current status of connected Bticino MyHome devices and provides buttons to Open, Close or Stop a MyHome automation
- Get Status: Click to refresh device status
- OPEN: Open the MyHome automation
- CLOSE: Close the MyHome automation
- Stop: Stop the MyHome automation
- LED: The LED's to the right of the button are black until the button is clicked, then red to indicate the MyHome automation status for that button is active
Viking Settings: Common and Application Server
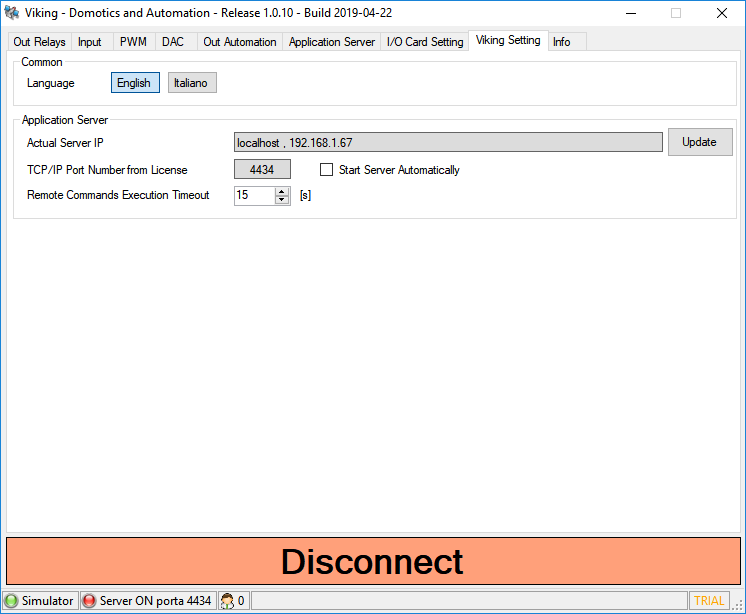
The Viking Setting tab is where configuration information about Viking itself (not the I/O cards) is stored.
- Common:
- Language: Choose the interface language, English or Italian
- Application Server: Settings for the application server contained in Viking
- Actual Server IP: IP address for the Viking program's application server. This is the IP address of the machine where this instance of Viking is running
- Update: Click this button to read the IP address of the machine if it has changed since the last setting
- TCP/IP Port Number from License: Port number of Viking's application server. This is read from your Viking license file.
- Start Server Automatically: If checked, Viking's application server will start when Viking starts
- Remote Commands Execution Timeout: How long to wait in seconds before considering a remote command to have timed out
- Actual Server IP: IP address for the Viking program's application server. This is the IP address of the machine where this instance of Viking is running
Multi Instance
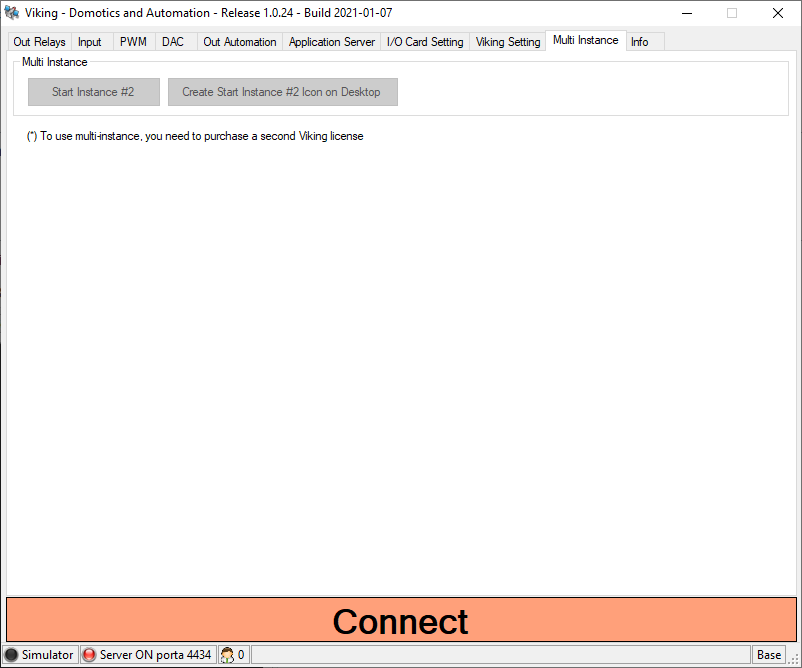
Starting from release 1.0.24 Viking allow multi instance running correctly in on PC. This tab allow you to start the 2nd instance or create a shortcut icon on the Desktop to start the 2nd instance.
- Start Instance #2: click the button to open a second instance of Viking
- Create Start Instance #2 Icon on Desktop: create a shortcut icon on the Desktop to start the 2nd instance
Application Server Monitor Window
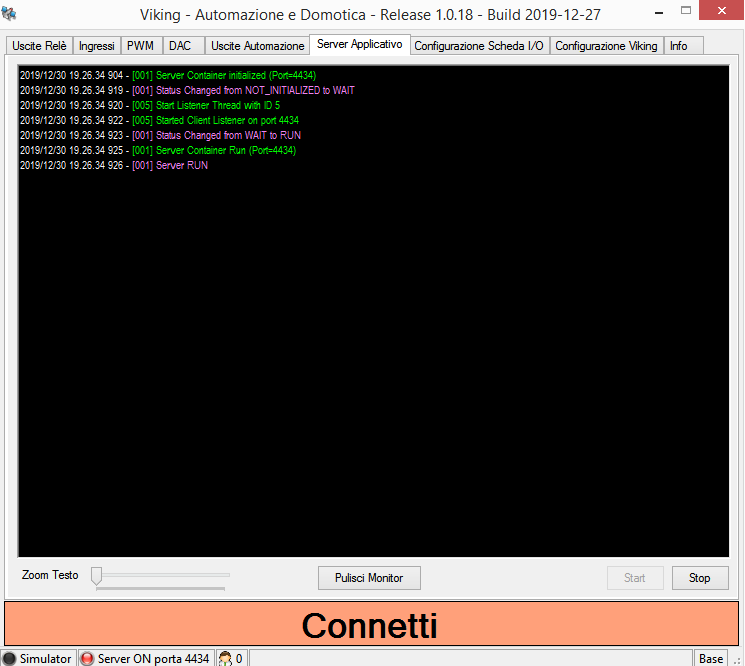
The Application Server tab contains a running log of timestamped application server commands and responses:
- Text Zoom: Move the slider to change the font size for the text in the monitor window
- Clear Monitor: remove all text in the monitor log of application server
- Start: start the application server
- Stop: stop the application server
Viking ASCOM Switch driver for 3rd part Automation Software Integration
We have developed [Thanks to Michael Poelzl] an ASCOM Switch Driver for VIking that allow other automation software, that support ASCOM Switch Client, to use Viking for interface to all the I/O cards managed by Viking. Starting from Viking 1.0.26 we support the ASCOM interaction with this driver. You can download it on our website at download section https://software.starkeeper.it
Prerequisites are:
- Viking 1.0.26 ore newer Installed and configured
- ASCOM Platform 6.4 or newer installed
- Microsoft Dot.Net Framework 4.6 installed
How to install
- check the prerequisites above
- download the Viking ASCOM Switch Driver Installer from our website
- start the installation
- follow instructions at video during installation
- Open your Automation Software (SGP,NINA...)
- Select in the ASCOM Switch section of your software the driver choosing the "ASCOM Switch Driver for Starkeeper Viking Application"
- Open the ASCOM configuration form

- Viking IP Address: insert the IP of the PC where Viking is installed. Insert 127.0.0.1 if your Viking is installed on the same PC of your automation software.
- Viking Port Number: default port is 4434 for istance 1, 4435 for instance 2
- Start VIking on Connect: allow ASCOM driver to start Viking Application at connection if not already start. To work with this feature Viking must start like admin (use compatibility tab of Viking link icon to enable the admini mode)
- Instance 1 or 2: choose the istance you wan to start
- Viking App Path: select the path were Viking is installed (usually c:\Program Files (x86)\Viking...
- Logging: enable the logging on file of the driver activities
- Write ASCOM Log: writing in ASCOM log default folder the ASCOM activities
- Log TCP Messages: add to log also the protocol messages exchanged between Viking and the ASCOM driver
- Connect and test it, your automation software will retrieve all the configuration data from Viking and will show what is provided by the I/O card configured in Viking
- Follow the instructions of your automation software on how use the Switch facilities
[[Category:All]
