Voyager Setup
Color Coding
Throughout the Setup workspace, Voyager uses color to indicate the following:
- Black: A normal setting
- Gold or Yellow: Use caution when changing as things may not work well or as expected
- Red: Use extreme care when changing this setting - the wrong value can damage your equipment or the imaging session may fail
Voyager Setup Workspace
Click the Voyager button in the Setup workspace to display the Voyager settings window, which contains miscellaneous settings about Voyager's operation:

CCD Graph
The CCD Graph panel of the Voyager setup workspace contains parameters for the CCD Widget displayed in the Status Window

- Default Scale Temp. Top (°C): Default value for the top of the temperature scale, in °C
- Default Scale Temp. Bottom (°C): Default value for the bottom of the temperature scale, in °C
- Timer Interval in Graph: Total time represented by the X axis of the graph in seconds
- Show Min/Max Temperature Axis Label: If checked, display the white boxes with the values represented by the top and bottom of the Y axis (temperature) of the CCD Widget displayed in the Status Window
- Show Temperature Label relative to Mouse: If checked, hovering the mouse shows the temperature of the point under the mouse cursor in the CCD Widget displayed in the Status Window
- AutoScale Temperature Axis: If checked, automatically scale the values of the top and bottom of the Y axis (temperature) of the CCD Widget displayed in the Status Window so the displayed values fit in the widget
Guide Box
The Guide Box panel of the Voyager setup workspace contains parameters for the Guide Widget displayed in the Status Window:

- Default Pixel Scale: The number selected from the drop-down box represents the number of pixels, +/-, represented by the Y axis scale of the Guide Widget displayed in the Status Window. For example, a value of 1 here means the top of the graph represents a guide error of +1 pixels, and the bottom of the graph represents a guide error of -1 pixels
- Default Frame Scale: The number of guiding frames (exposures) represented by the X axis of the graph
- Show Scale Label: If checked, the values of Default Pixel Scale and Default Frame Scale are displayed in white boxes at the top and bottom respectively of the Guide Widget displayed in the Status Window
- Show Temperature Label relative to Mouse: If checked, when the mouse is hovered over the Guide Widget displayed in the Status Window, a white box pops up over the graph and shows the temperature represented by the mouse pointer location
- Show StarMass Mobile Mean Value: If checked, the moving average of the StarMass value is displayed in the Guide Widget displayed in the Status Window
- Show Sub RMS Value: If checked, the RMS value of the current guide exposure is displayed in the Guide Widget displayed in the Status Window
TARGET Graph
The TARGET Graph panel of the Voyager setup workspace contains parameters for the Target Widget displayed in the Status Window
- Show Min/Max Altitude Axis Label: If checked, label the Y axis (altitude) of the Target Widget displayed in the Status Window with the values of the bottom and top lines of the graph
- Show Time Label relative to Mouse: If checked, hovering the mouse over the Target Widget displayed in the Status Window pops up a box with the value corresponding to the X axis (time) value of the mouse pointer position
ECHO Box
The ECHO Box panel of the Voyager Setup workspace contains settings for the Monitor Window, formerly known as the Echo box.

- Use Big Font Size in Echo Windows: If checked, use large fonts in the Monitor Window, which is the window where status messages appear for running actions
External PROCESS Starting
The External PROCESS Starting panel of the Voyager Setup workspace contains information relative to starting processes external to Voyager:

- Wait Process Starting for: Number of seconds to wait after starting a process external to Voyager, e.g. PHD2 guiding software, TheSkyX planetarium or Maxim DL camera control
- Force Starting TSX by Voyager: If you have trouble with Voyager starting TheSkyX by its normal method (Windows 10 DCOM), try checking this box and Voyager will use an alternate method to start TheSkyX
Logging
The Logging panel of the Voyager Setup workspace contains settings that control what is saved in the Voyager log file, and for how long:

- Logs age maximum: The length of time to store information in Voyager logs in days, after the selected time the oldest log file will be deleted from disk
- ASCOM Extend info: If checked, extended information from ASCOM devices is stored in the log
- CCD Peltier Data: If checked, CCD sensor cooling data is stored in the log
- CCD Cooling Deviation: If checked, CCD sensor deviation from the desired value is stored in the log
- PHD2 Debug: If checked, PHD2 guiding software debug information is stored in the log
- GUIDE Data Stream: If checked, the stream of information received from the guiding software is stored in the log
- BROADCAST Msg Send Log: If checked, broadcast messages are stored in the log . Broadcast message are internal messages between controls that manage the setup
- SEQUENCE Abort Expose Screenshot: If checked, when a sequence is aborted, a screenshot is taken and stored in the log . The screenshot will be stored in the screenshot directory with the other directories of Voyager like the log directory. A reference to the name of the saved screenshot will be added also to the actual log file
Window and Sound
The Window and Sound panels of the Voyager Setup workspace contain settings for Voyager's window transparency and sounds:

- Window:
- Transparency: A number between 0 and 30 controlling the transparency of Voyager's Main Windows
- Sound:
- On/Off/Only Critical Event: Controls whether Voyager plays a sound through the PC's sound card - On = always, Off= never, Only Critical Event = only when critical events occur. Critical events are all the events reported in red in the Monitor window
DEBUG
The DEBUG panel of the Voyager Setup workspace has settings to help with debugging:
![]()
- Emulate Precise Pointing for Simulator: If checked, Voyager will skip precision pointing actions and do only the normal goto (slew) actions. This is useful when testing a sequence with a simulator, as most simulators cannot perform plate solves
ASK BEFORE
The ASK BEFORE panel of the Voyager Setup workspace has settings controlling whether Voyager confirms various actions before performing them:

- Confirm for OnTheFly GOTO Action: If checked, Voyager will ask confirmation before performing a goto action from the OnTheFly workspace
- Confirm for OnTheFly SEQUENCE Action: If checked, Voyager will ask confirmation before running a Sequence from the OnTheFly workspace
- Confirm for OnTheFly SYNC Action: If checked, Voyager will ask confirmation before running a Sync action from the OnTheFly workspace
- Confirm for Close Voyager Application: If checked, Voyager will ask confirmation closing down
PATH
The PATH panel of the Voyager Setup workspace instructs Voyager where to save images

- Sequence Path:
- Default: Voyager saves images in the default location, which will be in your Windows Documents folder: \Documents\Voyager\Sequence\<target name>
- Specific: Click the second radio button and click the folder icon. Browse to the path where you want images saved
- Manual Apply: edit manually or with copy and paste and press Manual Apply button
Application Server
The Application Server panel of the Voyager Setup workspace tells Voyager whether or not to start the bundled Application Server.
The Application Server is bundled with the base version starting with Voyager 2.0.14f (daily build) and 2.1.0 (stable).
Refer to the Application Server section for more information.
Changes to any of these settings take effect the next time you start Voyager.

- Activate it on Start (*): If checked, start the bundled application server when Voyager starts. This is not checked by default
- Not Logging Heartbeat(*): If checked, do not log the Heartbeat events which occur every 5 seconds. This is checked by default, as there are many heartbeat events per hour and you probably don't want to log them all
- Allow Dashboard Service: If checked, allow the Voyager Web Dashboard service to operate
- Dashboard JPG Quality: Select the desired JPG quality level from the drop-down. Use a lower quality if your connection speed can't support a higher quality, or if you are on a metered connection and wish to reduce the amount of data transferred.
Web Server
As an option, Voyager's Web Dashboard can be hosted on the machine running Voyager. If you choose this option, the HTML and supporting files used in the Web Dashboard will be served to your browser via an internal web server included with Voyager. No Internet connection is required with this option.
Alternatively, if you have an Internet connection, you can run the Web Dashboard using the files hosted at http://www.starkeeper.it/wdash/.

- Activate it on Start (*): If checked, Voyager's internal web server will start when you start Voyager. This web server will be used to serve the Web Dashboard files
- TCP/IP Port: Select the TCP/IP port on which the web server will listen for a connection. The default is port 80.
For more information on using the Web Dashboard, see https://www.starkeeper.it/wdashinfo/
Startup Option
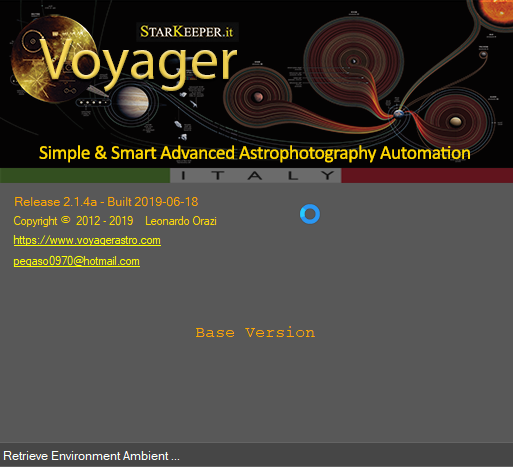
As of Voyager 2.1.4a, you can choose to hide personal info from the startup form.

- Hide Personal Info in Startup Form: If checked, the startup form (splash screen) shown when Voyager starts up will not contain your name or the Voyager serial number - it will look similar to this:

Colorblind - Help for Alarm Text
Allows customization of colors used in Alarm notifications - the normally red text that indicates an error has occurred

- Personalized BackColor Monitor (*): Click the Pick Color button and choose a color to use for the background color of the Monitor window.
- Personalized BackColor Settings (*): Click the Pick Color button and choose a color to use for the background color of Alarm (error) text in Setup
- Personalized ForeColor (*): Click the Pick Color button and choose a color to use for the foreground color of Alarm (error) text in both Setup and the Monitor window
- Default Colors: Click to return to the Default Color scheme