Difference between revisions of "Installation"
| Line 51: | Line 51: | ||
**TheSky6 | **TheSky6 | ||
**Hallo Northern Sky | **Hallo Northern Sky | ||
| + | **Stellarium (officially tested from version 0.21.0 using remote interface) | ||
*PLATE SOLVING / BLIND SOLVING | *PLATE SOLVING / BLIND SOLVING | ||
| Line 78: | Line 79: | ||
**Sky Flats | **Sky Flats | ||
**ASCOM Cover Calibrator Device | **ASCOM Cover Calibrator Device | ||
| + | **Geoptik Flat Device | ||
*ROTATOR | *ROTATOR | ||
**connected via ASCOM Platform 6.x https://ascom-standards.org | **connected via ASCOM Platform 6.x https://ascom-standards.org | ||
| + | **RCOS TCC Rotator | ||
*DOME | *DOME | ||
Revision as of 15:23, 7 June 2021
Voyager is a shareware program. The demo version is free to use. The author assumes no liability resulting from improper use or bugs in the program. As an integrator of third-party applications, VOYAGER cannot know for sure the behavior of other software. Any damage arising from the use of VOYAGER is not covered by any insurance.
USE AT YOUR OWN RISK!
The latest version of the application can be downloaded here: https://software.starkeeper.it/#download_voyager_section
Prerequisites
VOYAGER runs on Microsoft Windows operating systems, both 32 and 64 bit. Basic requirements are:
- Operating Systems 32 / 64bit Windows XP with Service Pack 3, Windows Vista, Windows 7, Windows 8 and 8.1,
Windows 10
- Microsoft Dot Net 4.0
- ASCOM platform from version 6.x https://ascom-standards.org
- minimum 1024x600 screen
VOYAGER has also been tested on Mac using PARALLELS virtual environment.
Third Party Applications and Versions Supported by Voyager
Applications, with minimum versions, that can be managed by VOYAGER:
- CAMERA CCD / CMOS / DSLR
- connected via ASCOM Platform 6.x https://ascom-standards.org All cameras have ASCOM Driver
- or Maxim DL CCD version 5.x or later(All cameras supported from Maxim DL)
- or TheSkyX using Camera Add On (All cameras supported from the TheSkyX Camera Add On)
- or ASI Camera (ZWO ASI native driver direct to camera with SDK)
- or QHY Camera (QHY Native driver direct to camera with SDK)
- or FLI Camera (FLI Native driver direct to camera with LibFli.dll)
- or QSI CCD (QSI COM component released by QSI to install)
- MOUNT / TELESCOPE
- connected via ASCOM Platform 6.x https://ascom-standards.org
- or TheSky6 Professional Edition 6.0.0.24 and later
- or TheSkyX Professional Edition 10.1.11 and later
- Array Virtual Mount (Advanced version of Voyager)
- GUIDING
- PHD2 version 2.3.0 and later
- or MaximDL 5.x and later
- or TheSkyX
- PLANETARIUM
- Cartes du Ciel
- TheSkyX
- TheSky6
- Hallo Northern Sky
- Stellarium (officially tested from version 0.21.0 using remote interface)
- PLATE SOLVING / BLIND SOLVING
- PinPoint LE version 5.x
- or PinPoint FULL version 5.x and later
- or TheSkyX ImageLink
- or PlateSolve2
- or nova.astrometry.net
- or All Sky Plate Solver
- or ASTAP
- FOCUSER
- connected via ASCOM Platform 6.x https://ascom-standards.org
- or FocusMax 3.4.40 and later
- or MaximDL 5.x and later
- or TheSkyX @focus2 and @focus3
- FLAT DEVICE
- Gemini SnapCap
- Alnitak Flat-Fielding Device
- Tecnosky TecnoCap and MultiLevel
- Arduino Flat Device
- Artesky Flat Device
- Sky Flats
- ASCOM Cover Calibrator Device
- Geoptik Flat Device
- ROTATOR
- connected via ASCOM Platform 6.x https://ascom-standards.org
- RCOS TCC Rotator
- DOME
- connected via ASCOM Platform 6.x https://ascom-standards.org
- ScopeDome LS with ScopeSync
- NexDome
- WEATHER
- AAG Cloudwatcher / Solo
- Boltwood / Clarity II / SkyAlert Weather Station or compatible
- OBSERVING CONDITIONS
- connected via ASCOM Platform 6.x https://ascom-standards.org
- using Viking Client
- SKY QUALITY MONITOR (SQM)
- connected via ASCOM Platform 6.x https://ascom-standards.org
- SAFETY MONITOR (SQM)
- connected via ASCOM Platform 6.x https://ascom-standards.org
- Textfile Safety Monitor
- I/O CARDS
- Viking and all supported Cards
The availability of executable actions within Voyager depends on the number and capability of connected applications.
Installation Video
There is a video on how to install Voyager on the Voyager Astro Imaging YouTube channel:
Installation Procedure
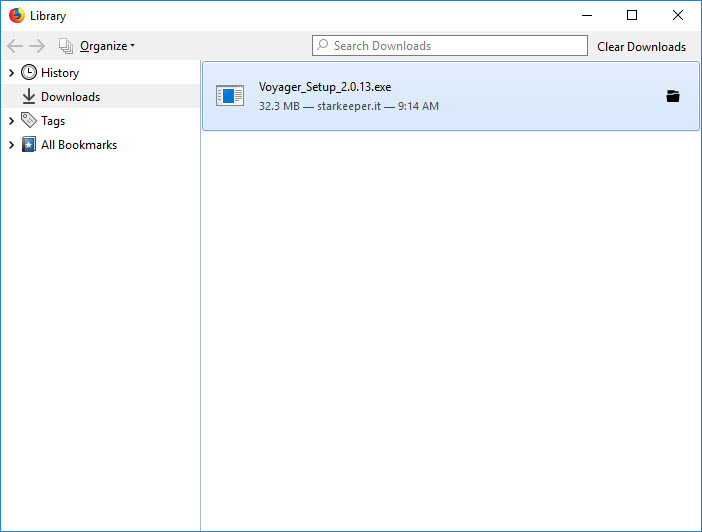
After downloading the installation file:
1. Start by double clicking on the downloaded file:
2. Voyager is a signed application as of Voyager 2.2.1. It is signed by "Starkeeper di Orazi Leonardo."
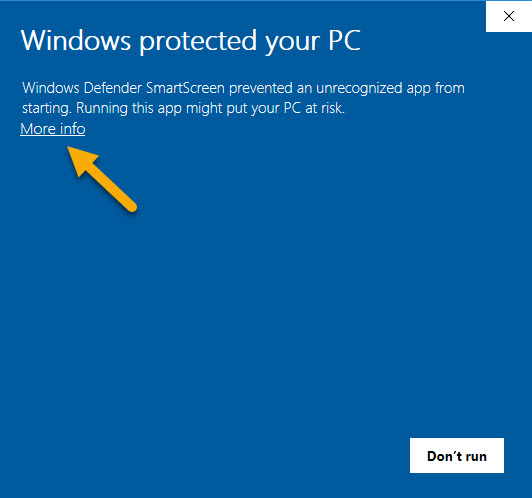
Windows 10 may or may not show a blue dialog box saying Windows 10 protected your PC:
If it does, click the More info link:
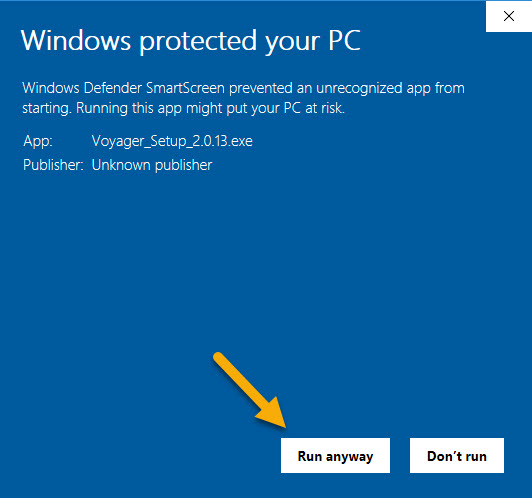
3. After clicking More Info, you will see this additional information.
As of Voyager 2.2.1, Voyager is a signed application. The Publisher will be: "Starkeeper di Orazi Leonardo" instead of Unknown publisher.
Click the Run Anyway button to continue installing Voyager:
4. If you get the User Account Control warning asking if you want to allow this application from "Starkeeper di Orazi Leonardo" to make changes to your PC, click Yes to continue installing Voyager.
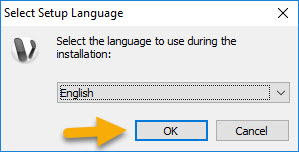
5. Choose your installation language, English or Italiano, and click OK
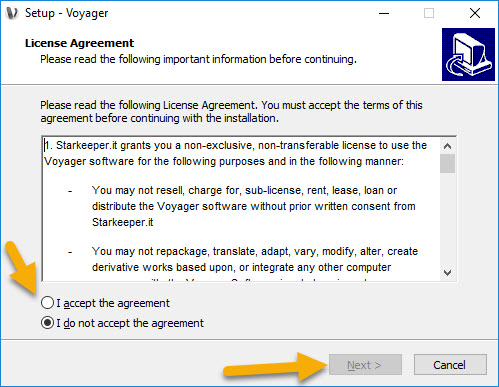
6. Read the license agreement, click the I accept the agreement radio button, and click the Next button to continue installing Voyager:
7. Optionally, check the "Create a desktop shortcut" box and click Next to continue installing Voyager:
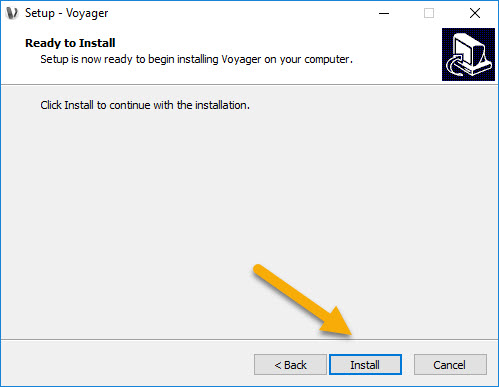
8. Finally, click the Install button to do the installation:
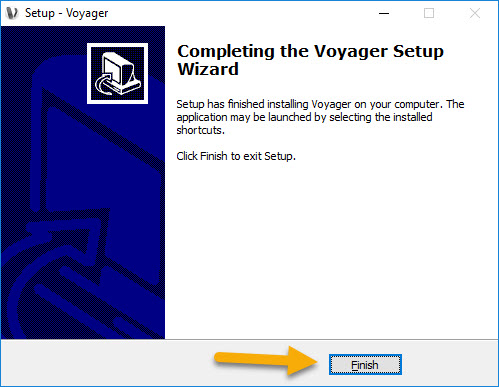
9. You will see a dialog box with a progress bar while files are extracted and installed. Click Finish to complete the installation:
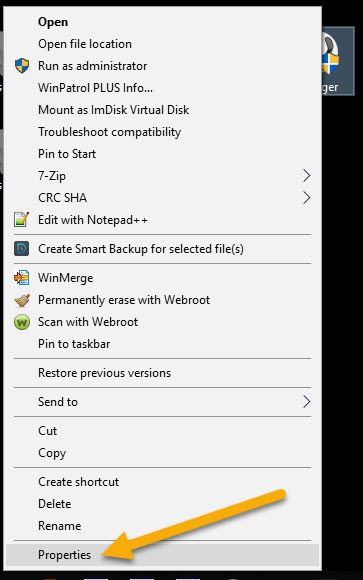
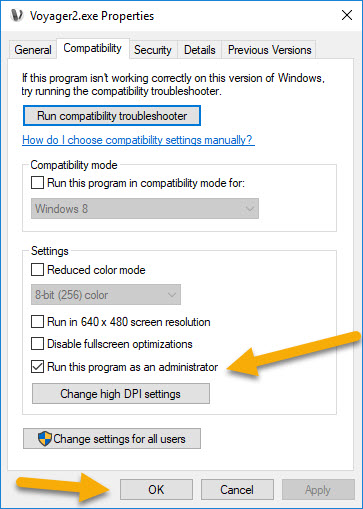
10. To make Voyager run as Administrator, you can set the properties from either the desktop shortcut, if you created one, or from the Voyager2.exe file's properties. If you created a desktop shortcut, right click the shortcut and click Properties:
Next click the Compatibility tab, then check the "Run this program as administrator" checkbox and click OK to save your changes.
OR
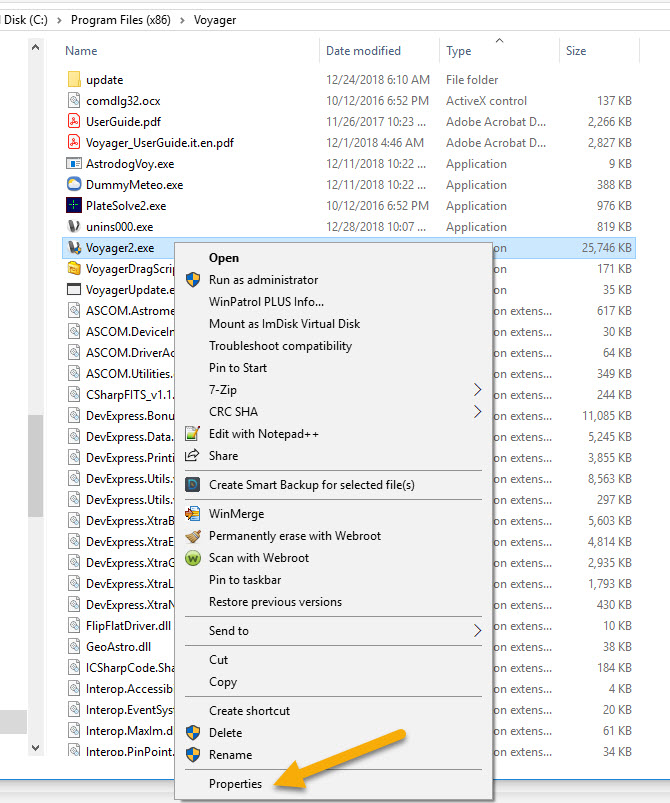
If you didn't create a desktop shortcut, navigate to the directory containing Voyager2.exe - usually this is in C:\Program Files(86)\Voyager\. Right click the Voyager2.exe file and click Properties:
Next click the Compatibility tab, then check the "Run this program as administrator" checkbox and click OK to save your changes.
Congratulations, you have installed Voyager!
Voyager Folders
When you first run VOYAGER, it will create a series of folders in your Windows user's Documents directory:
- ConfigSequence
Configuration files of the automated imaging sequences or automatic flat taking sequences
- Data
Database files for various pourpouse
- FIT
FITS files (image files with metadata) created by VOYAGER actions for plate solving and test shots. These files are erased at each start of Voyager.
- GuideFIT
FITS files created by guiding actions. These are the screenshot and the jpg or fit file related to a find star problem. These files can be delete whenever you choose. However, if you need help with guiding, you will need to provide one or more files from this folder to assist in troubleshooting, so you may want to keep the last session's files at least.
- Log
Text files with the log of operations performed by Voyager. The level of information is very high. These files will be required in case of bugs to fix or anomalies to interpret.
- Profile
Settings files for the various imaging system configurations you define
- ProfileBackup
AutoSaving of Profile folder with datetime naming at each start of Voyager and before an online update of Release from Voyager. You can define age of backup to retain on this folder using the Setting of VOyager, tab Voyager, Box Profile Backup
- Renting
Ticket file system access reserved to Voyager Renting Plugin
- ScreenShot
Screenshots of the program in case of watchdog events such as guiding or other failures
- Script
DragScript files used to automate imaging sessions
- Sequence
Default folder containing the FITS files generated by running sequences, the files are sorted to subfolders that are created with the name of the target. You can override this and send FITS files to a directory of your choice in the Setup section.
Log File
The Log folder contains the files Voyager creates as it executes tasks. There will be a file for each day of use, and each file will contain at most the logs from 24 hours of operation. Information in the log file is intended to help the developer trace the cause of a problem in the event of application failure or malfunction.
The developer may ask you to attach a zip file with the relevant portion of the log to help track down a problem. You can use a text editor, such as Notepad or the free third party editor Notepad++ to find the time of the problem, and then trim the log file down to the relevant lines. If there are more than a few lines of interest, save the relevant lines to a new text file and then compress them into a .zip file to attach to your email requesting help.
You may be asked to email the relevant portion of the log file with a text editor, and attach a zip file in your email They will be required as necessary to send an email. In that case it will be necessary to decrease the size of the zip file and select only the necessary period. The log file entries are timestamped, so just select the entries around the time of the problem.
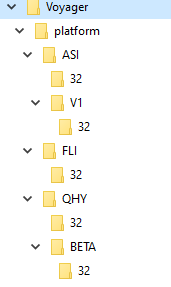
SDK Platform Folder
The SDK platform folder contains all the SDK/DLL Library used by Voyager for external Camera/Driver. It is organized by Vendor and internally by architecture bits.
This folder is not located in document folder but in Voyager installation folder, usually C:\Program Files (x86)\Voyager
Installing Previous Versions
Retrieve the old version setup from the Releases Category in Voyager's forum and execute the installer.
If you can't find the version you are looking for please contact support.
